
I used the following materials:
2 boxes of chocolate cake mixes
2 and 1/2 boxes of white icing
black Wilton gel icing (found in the cake decorating aisle of walmart)
green Wilton gel icing
blue tube icing
green fondue
ice cream cones regular size and minis
marshmellows regular size and mini
green apple twizzlers
chocolate covered orange sticks
mini hershey bars
1-cake board
tooth picks

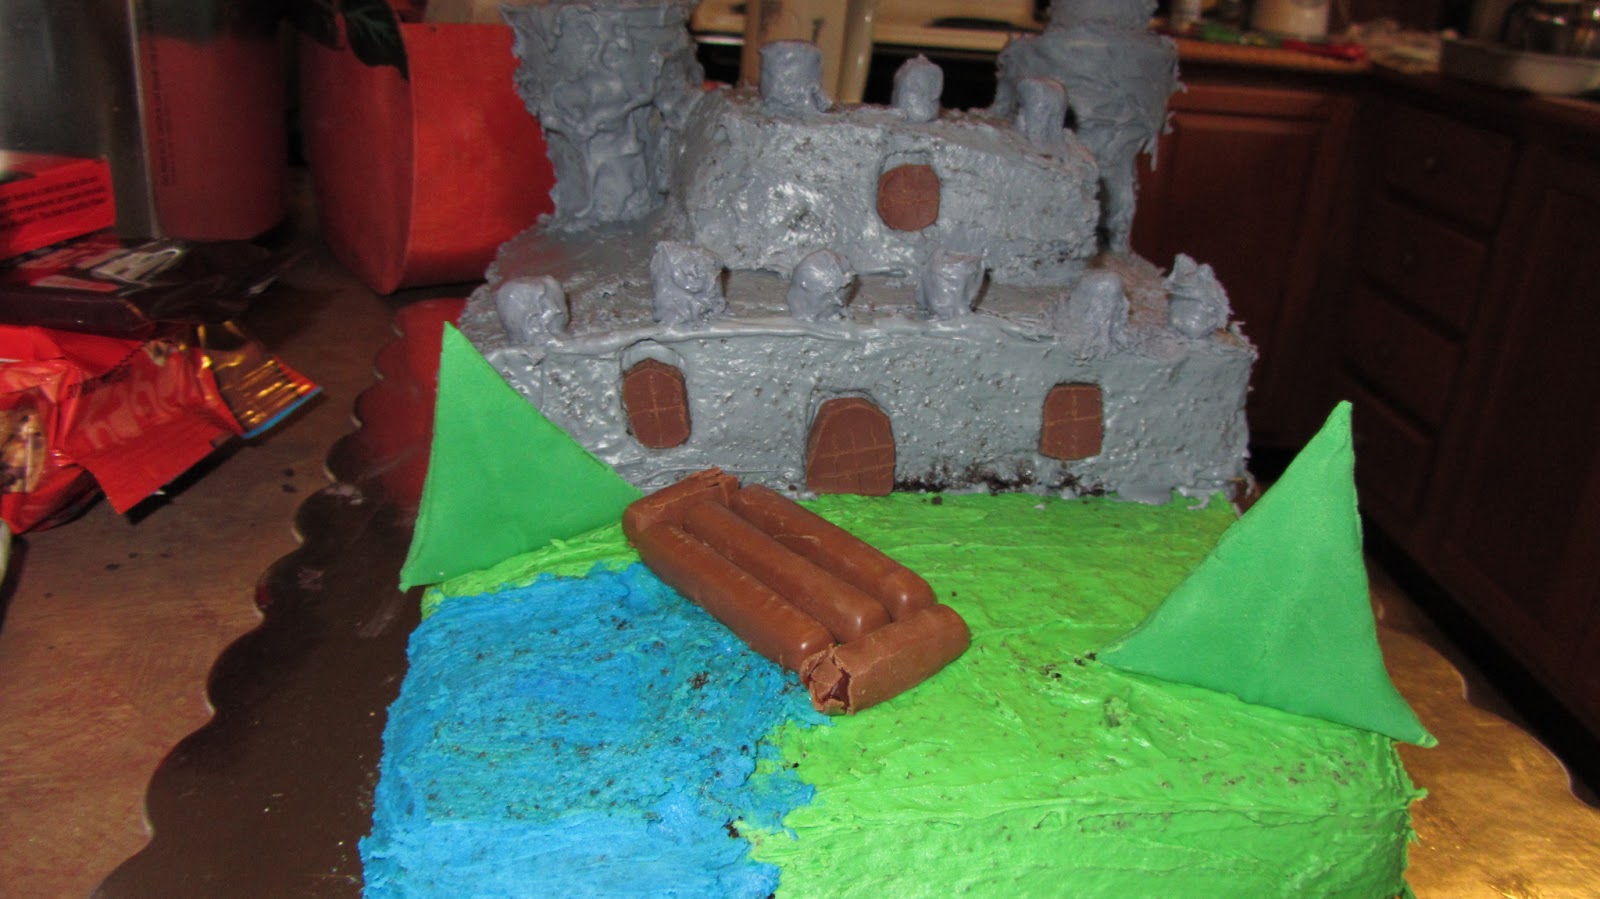
While the second cake is baking begin rolling out the fondue and cut out triangle shapes for your trees. Cut two for each tree. Add a toothpick between each triangle to attach it to the cake. These can be laid aside while you icing the bottom layer. I made a yard and then began the castle on the first layer. The green yard was made from using about 1/4 of a can of white icing and mixing in the green Wilton gel. Add the gel slowly to get the shade you want. I got the grey color from mixing the white icing and the black gel food coloring. Add the black slowly or else you will end up with a black castle. I used a tooth pick to add the color and folded it in completely before adding any more. You might also consider doing a castle surrounded by water and use blue instead of the green. If you choose to do a pond make a small area of the cake blue. Once the bottom cake is completely covered with icing like you want it you can begin working with the second cake or working to make the towers you are going to need. I did both cakes before I made the towers because they are very touchy once you begin icing them. The second cake will need to be cut to make the 2nd layer of the castle. I eneded up only making 2 layers but there is enough left over to make a small top if you would like another layer. I was not sure it would look right because then the layers would be taller than the towers.


The stones around the second and top layer of the castle are mini marshmellows rolled in cake icing. The doors and windows are sculpted mini Hershey bars. The bridge is made from chocolate covered orange sticks. The green apple twizzlers are tall overgrown grass by the pond and ivy crawling up the side of the castle. It was first intended to be used to make a willow tree with a mini cone and marshmellow but it was too heavy and it eventually fell apart.

Be prepared to splurge on supplies and have at least 5-6 hours on hand to complete this project. I began work on it about 10:30 AM and it was complete around 4PM, and this was because my husband had baked the first cake while I was still fast asleep!

No comments:
Post a Comment